Candle making is a satisfying and rewarding craft, but it can be daunting for beginners who are not familiar with the process. One of the essential components of a candle is the wick, which is responsible for creating the flame that burns the wax. In this article, we will guide you through the process of putting a wick in a candle mold, step by step.
Choosing the Right Wick
The first step in putting a wick in a candle mold is to choose the right wick. Selecting the appropriate wick is crucial to ensure that the candle burns correctly. There are several factors to consider when selecting a wick, including the type of wax used, the size of the candle, and the desired burn time.
Factors to Consider When Selecting a Wick
The type of wax used in your candle will determine the type of wick you should use. Different waxes have different melting points and densities, which affect the way the candle burns. For example, soy wax burns at a lower temperature than paraffin wax, so it requires a smaller wick.
The size of the candle also affects the type of wick you should choose. A larger candle requires a thicker wick to ensure that it burns evenly. Similarly, a smaller candle requires a thinner wick to prevent it from burning too quickly.
Finally, the desired burn time of the candle is an essential factor in selecting a wick. If you want your candle to burn for a long time, you will need a thicker wick that can sustain the flame for an extended period.
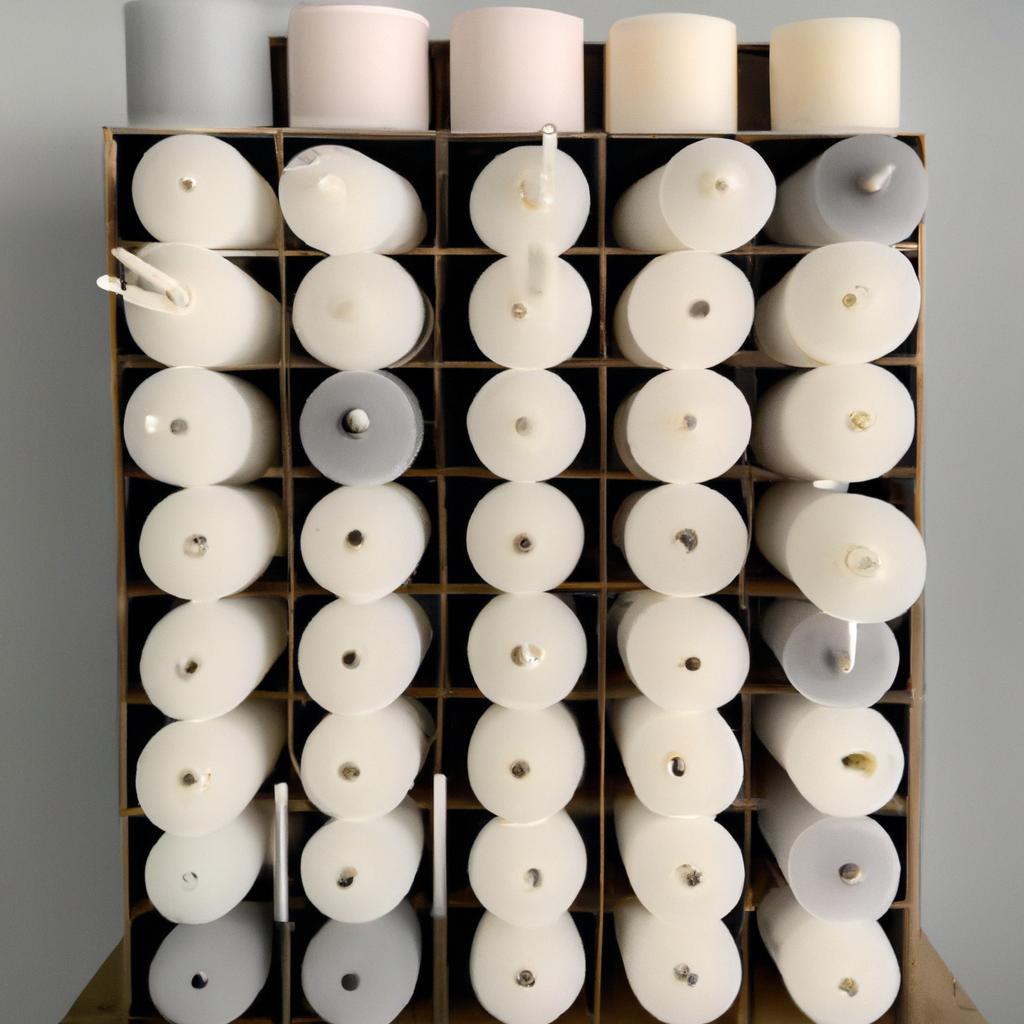
Types of Wicks Available in the Market
There are several types of wicks available in the market, each with its unique features and benefits. Here are some of the most common types of wicks:
-
Cotton wicks: These are the most common type of wicks and are suitable for most types of candles. Cotton wicks are easy to work with and produce a stable flame.
-
Braided wicks: Braided wicks are made by braiding several strands of cotton or other materials. They are suitable for larger candles and produce a brighter flame.
-
Wooden wicks: Wooden wicks are becoming increasingly popular in candle making. They produce a crackling sound when they burn, which adds to the ambiance of the candle.
-
Zinc core wicks: Zinc core wicks have a metal core that provides stability and prevents the wick from falling over.
In the next section, we will discuss how to prepare the wick before placing it in the mold.
Preparing the Wick
Before you place the wick in the mold, you need to prepare it to ensure that it burns correctly. This involves cutting the wick to the appropriate length and pre-treating it to enhance its burning performance.
Cutting the Wick to the Appropriate Length
The length of the wick is critical to ensure that the candle burns correctly. If the wick is too short, the candle will not burn correctly, and if it is too long, the flame will be too large, leading to a dangerous situation.
To determine the appropriate length of the wick, measure the height of the candle and add an extra inch to the length. This extra inch will allow for the wick to be secured to the bottom of the mold.
Once you have determined the appropriate length, use a pair of scissors to cut the wick to the desired size.
Pre-Treating the Wick
Pre-treating the wick involves coating it with a substance that enhances its burning performance. The most common substance used for pre-treating a wick is wax.
To pre-treat the wick, melt some wax in a double boiler and dip the wick into the wax. Make sure that the entire wick is coated with wax, then remove it from the wax and lay it on a piece of parchment paper to cool and harden.
Once the wax has hardened, the wick is ready to be placed in the mold. In the next section, we will discuss how to place the wick in the mold.
Placing the Wick in the Mold
After preparing the wick, the next step is to place it in the mold. This step is crucial to ensure that the candle burns correctly. There are several methods of securing the wick in the mold, and the positioning of the wick is also critical to ensure proper burning.
Methods of Securing the Wick in the Mold
One of the most common methods of securing the wick in the mold is to use a wick holder. A wick holder is a metal or plastic device that holds the wick in place while the wax is poured into the mold. To use a wick holder, thread the wick through the center of the holder and place it in the center of the mold. Ensure that the wick holder is positioned at the bottom of the mold to keep the wick straight.
Another method of securing the wick is to use a pencil or chopstick. Simply tie the wick to the pencil or chopstick and place it across the top of the mold. Make sure that the wick is centered in the mold and that the pencil or chopstick is secured to the top of the mold.
Positioning the Wick to Ensure Proper Burning
Once the wick is secured in the mold, it is essential to position it correctly to ensure proper burning. The wick should be centered in the mold and should be straight. If the wick is not straight, it will burn unevenly, which will affect the appearance and performance of the candle.
To ensure that the wick is straight, you can use a wick straightener. A wick straightener is a small metal tool that is used to straighten the wick and ensure that it is centered in the mold. To use a wick straightener, place it over the wick and gently push it down until the wick is straight.
Once the wick is secured and positioned correctly, you are ready to pour the wax into the mold. In the next section, we will discuss how to pour the wax into the mold.
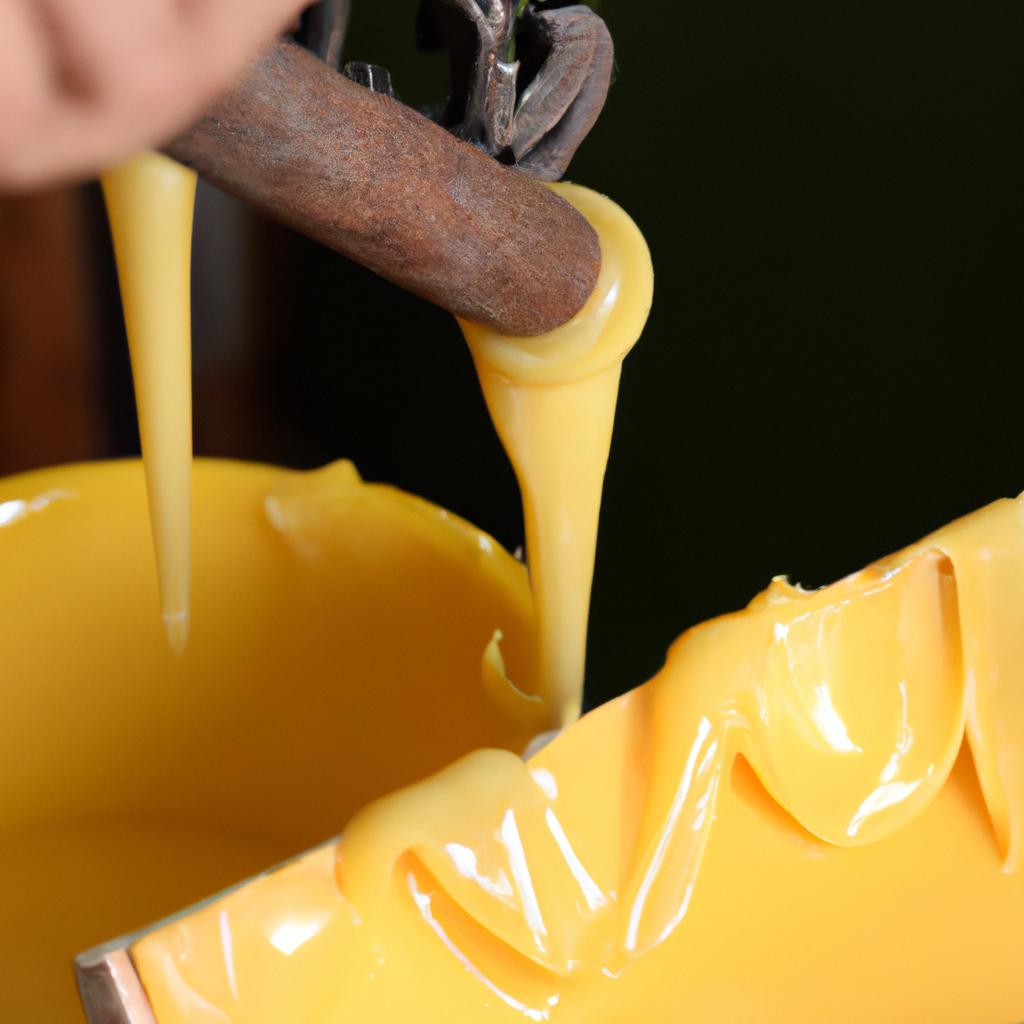
Pouring the Wax
Pouring the wax into the mold is a critical step in candle making. The way the wax is poured into the mold can affect the appearance and performance of the candle. Here are some tips for pouring wax into the mold with the wick in place:
Tips for Pouring Wax into the Mold with the Wick in Place
-
Make sure that the wax is at the correct temperature. The temperature of the wax when it is poured into the mold is critical to ensure proper burning. The ideal temperature for pouring wax is between 160 and 180 degrees Fahrenheit.
-
Pour the wax slowly. Pouring the wax too quickly can cause air bubbles to form, which will affect the appearance of the candle.
-
Fill the mold to the desired level. Make sure that you fill the mold to the level that you want the candle to be. Leave a small amount of space at the top of the mold to allow for shrinkage as the wax cools.
-
Keep the wick straight. As you pour the wax into the mold, make sure that the wick remains straight and centered.
-
Let the wax cool and harden. Once the wax is poured into the mold, let it cool and harden completely before removing the candle from the mold.
In the next section, we will discuss how to finish the candle by trimming the wick and ensuring a high-quality final product.
Pouring the Wax
Once you have prepared the wick and secured it in the mold, it’s time to pour the wax. Pouring the wax can be tricky, especially if you are working with a large mold or a more complex design. Here are some tips to help you pour the wax correctly:
Tips for Pouring Wax into the Mold with the Wick in Place
-
Use a double boiler: A double boiler is a great tool for melting wax and ensuring that it melts evenly. It also prevents the wax from overheating and burning.
-
Pour the wax slowly: Pouring the wax slowly ensures that it fills the mold evenly and prevents air bubbles from forming.
-
Use a thermometer: Using a thermometer to check the temperature of the wax is crucial to ensure that it doesn’t overheat and cause the mold to crack.
-
Tap the mold: After pouring the wax, tap the mold gently to release any air bubbles that may have formed.
Common Mistakes to Avoid During This Step
-
Overheating the wax: Overheating the wax can cause the mold to crack, and it can also affect the quality of the candle.
-
Pouring the wax too quickly: Pouring the wax too quickly can cause air bubbles to form, which can affect the quality of the candle.
-
Moving the candle: Moving the candle while the wax is still liquid can cause the wick to move and affect the way the candle burns.
Once you have poured the wax into the mold, you need to let it cool and harden before trimming the wick.
Finishing the Candle
After the wax has cooled and hardened, it’s time to finish the candle. This involves trimming the wick and ensuring that the candle is of high quality.
Trimming the Wick After the Candle has Cooled
Trimming the wick is an essential step in finishing the candle. A wick that is too long can cause the candle to burn unevenly, while a wick that is too short can cause the candle to extinguish prematurely.
To trim the wick, use a pair of scissors to cut it to about ¼ inch above the surface of the wax. This length ensures that the candle burns evenly and does not produce too much smoke.
Additional Tips for Ensuring a High-Quality Final Product
-
Use high-quality wax: Using high-quality wax ensures that the candle burns evenly and produces a pleasant scent.
-
Add fragrance: Adding fragrance to the wax can enhance the ambiance of the candle and make it more enjoyable to burn.
-
Use a candle thermometer: Using a candle thermometer to monitor the temperature of the wax ensures that it doesn’t overheat and cause the mold to crack.
-
Store the candle properly: Storing the candle in a cool, dry place ensures that it maintains its quality and doesn’t melt or deform.
In conclusion, putting a wick in a candle mold is a critical step in candle making. By choosing the right wick, preparing it correctly, pouring the wax carefully, and finishing the candle with care, you can create a high-quality product that is enjoyable to burn. At BeeKeepinglove.com, we offer a wide range of candle-making supplies and equipment to help you create beautiful candles that you can be proud of.
