Candle making is a fun and creative hobby that can yield beautiful and aromatic results. One of the essential steps in making candles is putting the wick in the mold correctly. In this article, we will discuss a step-by-step guide on how to put a wick in a silicone candle mold to make the perfect candle every time.
Gather the Necessary Materials
Before you begin, it is crucial to have all the necessary materials on hand. Gather a silicone candle mold, candle wicks, wick bars, a double boiler or a microwave-safe container, wax flakes, fragrance oils, and a thermometer. It is important to use the right materials to ensure that your candle-making process goes smoothly.
Silicone Candle Mold
Silicone candle molds are the best choice for beginners because they are easy to use, clean, and durable. They come in various shapes and sizes and can be reused multiple times.
Candle Wicks
Candle wicks come in different sizes and types, depending on the diameter of the candle you want to make. It is important to choose the right size wick to ensure that your candle burns correctly.
Wick Bars
Wick bars are essential for holding the wick in place while you pour the wax. They come in different sizes and can be adjusted to fit the mold you are using.
Double Boiler or Microwave-Safe Container
A double boiler or microwave-safe container is necessary for melting the wax flakes. It is essential to use a heat-resistant container to avoid any accidents.
Wax Flakes
Wax flakes are available in different types, such as soy, beeswax, or paraffin. Choose the type of wax you prefer and make sure to use the right amount to fill the mold.
Fragrance Oils
Fragrance oils are optional but can add a lovely aroma to your candle. Choose a scent that complements your wax type and personal preference.
Thermometer
A thermometer is necessary to monitor the temperature of the wax. It is essential to use the right temperature to ensure that your candle sets correctly.
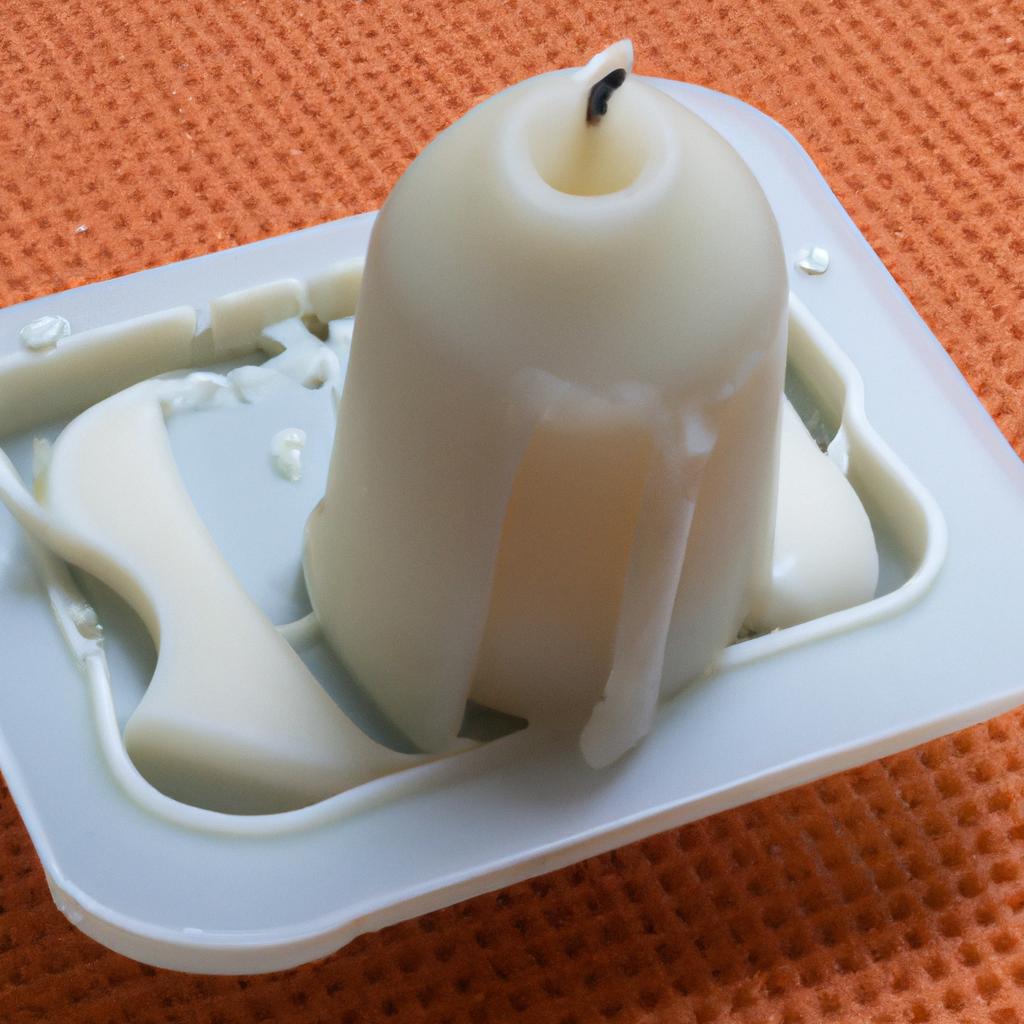
Prepare the Silicone Candle Mold
Preparing the silicone candle mold is important to ensure that your candle sets correctly.
Cleaning the Mold
Clean the mold with soap and water and dry it thoroughly. Avoid using any harsh chemicals that can damage the mold.
Positioning the Mold
Position the mold on a flat surface and make sure that it is stable. Place the wick bar on top of the mold, and adjust the height according to the size of the mold. Make sure that the wick bar is centered.
Prepare the Wick
Preparing the wick is essential to ensure that it is the right length and attached securely to the wick bar.
Measuring the Wick
Measure the length of the wick by placing it in the mold and adding a few inches to the top. Cut the wick to the desired length and make sure that it is straight.
Attaching the Wick to the Wick Bar
Attach the wick to the wick bar by slipping it through the hole and pulling it tight. Make sure that the wick is centered and straight. Secure it in place by tightening the screw on the wick bar.
Inserting the Wick in the Silicone Candle Mold
Inserting the wick in the silicone candle mold is crucial to ensure that it is centered and straight.
Positioning the Wick in the Mold
Position the wick in the center of the mold and make sure that it is straight. Wrap the top of the wick around a pencil or a skewer and lay it across the top of the mold. This will prevent the wick from falling into the wax when you pour it.
Securing the Wick in Place
Secure the wick in place by using a small amount of hot glue to attach it to the bottom of the mold. Make sure that the glue is dry before you pour the wax. Alternatively, you can use a wick sticker to attach the wick to the bottom of the mold.
By following these simple steps, you can put a wick in a silicone candle mold like a pro. The key is to be patient, take your time, and follow the instructions carefully. In the next section, we will discuss how to pour the candle wax into the mold to create the perfect candle.
Inserting the Wick in the Silicone Candle Mold
Now that you have prepared the silicone candle mold, it’s time to insert the wick into the mold.
Positioning the Wick in the Mold
Take the wick and thread it through the wick bar, ensuring that it is centered. Carefully pull the wick through the bottom of the mold and position it in the center. Make sure that the wick is straight and centered in the mold.
Securing the Wick in Place
To keep the wick in place, you can use a wick holder or a pencil. Place the wick holder or pencil over the top of the mold and wrap the excess wick around it. This will keep the wick straight and centered while you pour the wax.
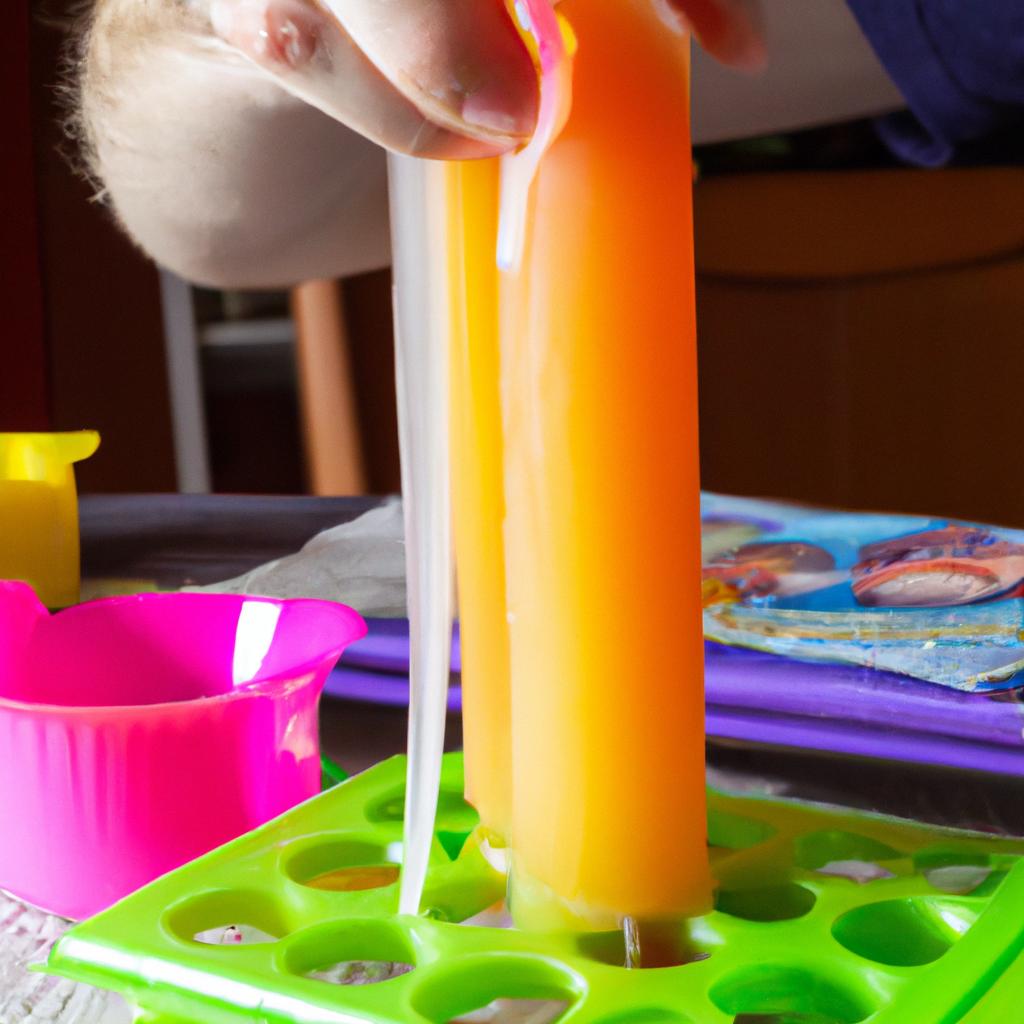
Pouring the Candle Wax
Now that the wick is securely in place, it’s time to pour the wax into the mold.
Preparing the Wax
Melt the wax flakes in a double boiler or a microwave-safe container, according to the manufacturer’s instructions. Once the wax has melted, add the fragrance oil, if desired, and stir well. Monitor the temperature of the wax with a thermometer and ensure that it is at the recommended temperature for your wax type.
Pouring the Wax into the Mold
Slowly pour the wax into the silicone candle mold, making sure to cover the wick completely. Avoid pouring the wax too quickly or too forcefully, as this can cause air bubbles to form in the wax. Fill the mold to the desired level and let it cool completely before removing the candle from the mold.
In conclusion, following the steps outlined in this article will ensure that you can put a wick in a silicone candle mold correctly. By gathering the necessary materials, preparing the mold and wick, and pouring the wax correctly, you can create beautiful and aromatic candles every time. Happy candle making from the BeeKeepingLove.com team!
