The season has begun, and many beekeepers are looking forward to the delivery of their package bees. Before the bees arrive, it is best to inspect your equipment and ensure that everything is in working order. The bee smoker is one of the most important instruments in any beekeeper’s toolbox. The smoke produced when lightly puffed creates temporary disorientation and disarray in the hive. Because the bees’ regular defensive behaviors are disrupted, you can work securely with the hive.
You can buy a bee smoker from your local store, online, or just decide to make your own homemade bee smoker. Today, we will help you learn how to make a bee smoker.
What is a bee smoker?
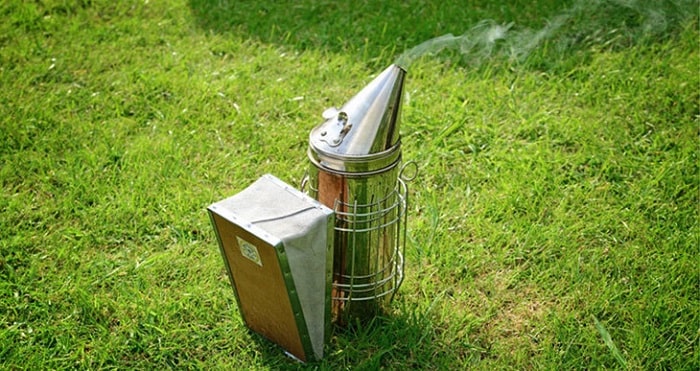
For millennia, humans have used smoke to quiet bee colonies. While the original honey collectors most likely used a smoldering flame to make smoke, beekeepers nowadays often utilize a hand-held smoker. Most modern bee smokers have three major components: a chamber to hold smoldering material, a nozzle to guide the smoke, and a bellows to pump fresh air into the chamber and drive smoke out of the nozzle.
Why do you need a bee smoker?
There have been numerous views proposed to explain why beekeepers require a bee smoker. Some believed the smoke signaled to the bees that the hive was on fire, which is why they dived into it. Because they would never abandon the honey and flee, the only option is to stay within the hive and drain the honey stores.
Smoke calms honey bees by interfering with their pheromones. When guard bees detect a potential threat approaching the hive, they produce a fragrance that warns the remainder of the colony. This aroma is obscured by smoke, keeping the colony from becoming disturbed in your presence. A bee smoker lets you manage the smoke so that it relaxes the honey bees without overwhelming the colony.
Advantages of a homemade bee smoker?
- You can easily make a bee vacuum cleaner with simple tools and local materials. In fact, you can use recycled materials, which helps to create a cleaner environment.
- You will save a lot of money instead of purchasing a commercial bee smoker. Homemade bee smokers are equally as effective as commercial one.
- You will learn a lot of useful things and sharpen your skills when you make your own devices at home.
How to make a homemade bee smoker?
You need to prepare some materials, including:
- 3 steel cans — 2 of the same size and 1 smaller one.
- Plastic or leather material for making the bellows.
- Wood planks.
- Nails, staples, or wire for fixing bellows fabric to the bellowing backs.
- Screws or wires.
- Hammer.
- Hacksaws, sharp machetes, or tin snips.
- A wooden can that will help prevent the can from getting crushed when making holes through the can.
- Screwdriver.
- Pliers but this is optional.
Guide step by step
-
Step 1: Making of the fire chamber
You must draw a circle toward the bottom of the large can. This is where you will drill an air hole so the bellows can blow air in. The hole’s width should be equivalent to the thickness of the finger. The bellows’ holes will be smaller than this one. The ejected air will flow through the opening to the can’s bottom and beneath the fire grate.
Then use the wooden wedge as a support as you hammer the nail to create the outline of the hole. The wedge will also assist keep the can from losing its shape when subjected to the pressure exerted by hammering.
After you nailed the circle around the drawn circle, you still tried using the nail to remove the metal circle, thus creating air holes. You should take a rock or use a hammer to flatten the edges of the air hole. This will keep you from getting injured while taking the next steps.
>>> Read more: TOP 5 Best Fuel For Bee Smoker & Buying Guide
-
Step 2: Making of a fire grate
You will be using the bottom of the smaller can as a fire grate. It should be slightly higher than where the air vents come in. To do this, simply measure the distance from the bottom of the chamber to the top of the stoma, then cut the mesh so that it is higher than this distance.
Then use a hammer and nail to punch some holes in the bottom of the net. You can imagine it like a coffee filter. These holes help the bellows guide air into the fire chamber.
You can use a saw to cut the “legs” off the side of the can. However, you need to keep the 3 legs and the rest of the legs will be used as hinges later. Finally, you will slide the grate into the fire chamber. If all is well done, the grating should be higher than the air vent.
-
Step 3: Making of the bellows
To do this, you will need two blocks of flat wood. The height, width, and thickness of the block should be 8 x 6 x ½ inches. You can cut the wood with a machete and then shape it into two boards of the desired thickness.
You will use leather or heavy plastic to make fabric bellows. The spare legs from step 2 will be used as hinges. Fold any two in half, then drill holes in the hinges to allow you to screw a nail through them. Because the legs are utilized as hinges, they will not last more than a year, so it is recommended to utilize aluminum to ensure a longer life of the hinge.
Next step, use a screwdriver or blade to drill a hole in the center of the board or bellows. This hole must be at least 0.6 inch wide or smaller than the air hole in the fire chamber.
As the bellows fabric, attach the leather or strong plastic. The greatest material is leather. Check that the fabric is tightly fastened to the bellows board. You must keep the bellows open, about the width of your hand. Attach a finger loop or two nails as an arch for opening the bellows to make it even more improvised. A copper or electrical wire is commonly used for this.
-
Step 4: Attach the bellows to the fire chamber
Fold the can’s sides and use a nail and hammer to cut two holes in them. Then, insert the three retaining pins into the center of the can to connect to the back of the bellows. The bellow holder should be screwed onto the bellows at this point.
As a result, we have a total of four holes that correspond to the four holes formed in the fire chamber. This will connect to the fire chamber. The air pushed out will be the same as the air entering the fire chamber. If you keep a distance of 1.5 inches between the two ventilation holes, it will prevent sparks from coming out of the fire chamber.
-
Step 5: Put on the smoker cap
When working on your hive, use the smoker’s cap to store more fuel and to modify the direction of the smoke. You will need a second huge can for this. Drill a hole into the fire chamber, just like you did while making a gas hole. Punch a hole in the smoker’s cap with a nail and hammer. To blow the smoke, cut this hole towards the top.
Smooth the drain hole’s edges with a stone or other metal implement. Then, one of the two enormous cans fits inside the other. Shred 1 inch from the bottom of the can lid, ensuring that the cut fits into the exhaust hole. For a snug and sturdy fit, press the bottom of the cut into the firebox and push it about ½ inch deep.
Place the bottom of the hood of the smoker into the fire chamber and your homemade bee smoker is ready to use.
Read more:
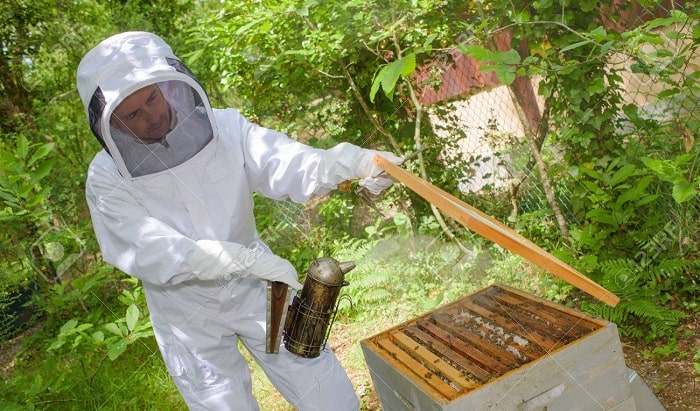
How to use a bee smoker?
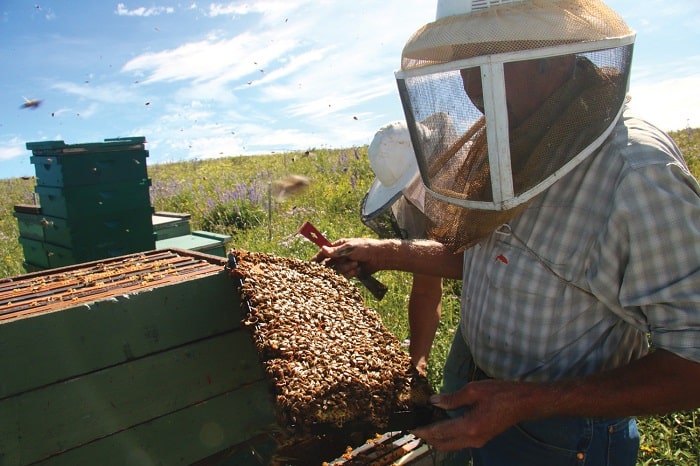
When inspecting hives or gathering honey, you can use your smoker. However, never misuse your cigarettes to the point that it is reasonable to believe you are causing urticaria. If you are new to beekeeping, avoid the tendency to abuse smoking. Remember that more smoke does not calm the bees. The amount of smoke utilized in the swarm will vary depending on its type.
A few puffs of smoke at the hive entrance should suffice if you are working with docile bees. You should approach the hive from the back or the side. Do not walk in front of the hive when you are applying bee smoker. If you are dealing with aggressive bees, use additional spray, but be careful not to overdo it with smoke.
When inspecting the entire hive, sprinkle talcum powder on the exposed frames and wait a few minutes, at least 20 seconds, before inspecting your frames. You should also avoid sucking on all sides of the hive, including all corners, the top and bottom. This is unquestionably a poor method of sucking the hive.
Conclusion
The homemade bee smoker features a simple design that makes use of basic equipment and materials. This style of hood will take you 2 to 4 hours to create, provided you have all the necessary equipment and materials at the start of the project.
Because the bee smoker’s simple design can cause the cap to become extremely hot when working on your hive, you must use cloth to hold the cap when refilling the smoker’s fuel. This handmade bee smoker is just as effective as a commercial one and will save you money by buying a new one online or in a local store. Not to mention the valuable talents you’ve acquired.
Related Posts:
